티스토리 뷰
UserDefaults
- 100KB 이하를 저장하는 게 이상적 (안된다는 건 아니고, 100KB가 최적화된 크기)

import UIKit

class ViewController: UIViewController {

    let label = UILabel()
    let button = UIButton(type: .system)

    override func viewDidLoad() {
        super.viewDidLoad()
        configureUI()
    }
}

extension ViewController {
    func save(text: String) {
        // 저장하는 함수
        UserDefaults.standard.set(text, forKey: "Key")
    }

    func load() -> String {
        // 불러오는 함수
        guard let safeText = UserDefaults.standard.string(forKey: "Key") else { return "Blank" }
        return safeText
    }
}

//MARK: -UI
extension ViewController {
    final private func configureUI() {
        setAttributes()
        addTarget()
        setConstraints()
    }

    final private func setAttributes() {
        label.text = self.load()
        button.setTitle("button", for: .normal)
    }

    final private func addTarget() {
        button.addTarget(self, action: #selector(buttonTapped(_:)), for: .touchUpInside)
    }

    @objc func buttonTapped(_ sender: UIButton) {
        let alertController = UIAlertController(title: "", message: "텍스트를 입력하세요.", preferredStyle: .alert)
        alertController.addTextField()
        let confirmAction = UIAlertAction(title: "확인", style: .default) { _ in
            guard let alertText = alertController.textFields?.first?.text else { return }
            self.label.text = alertText
            self.save(text: alertText)
        }

        let cancelAction = UIAlertAction(title: "취소", style: .default, handler: nil)
        alertController.addAction(cancelAction)
        alertController.addAction(confirmAction)
        present(alertController, animated: true)

    }

    final private func setConstraints() {
        view.addSubview(label)
        view.addSubview(button)

        label.translatesAutoresizingMaskIntoConstraints = false
        button.translatesAutoresizingMaskIntoConstraints = false

        NSLayoutConstraint.activate([
            label.centerXAnchor.constraint(equalTo: view.centerXAnchor),
            label.centerYAnchor.constraint(equalTo: view.centerYAnchor),

            button.topAnchor.constraint(equalTo: label.bottomAnchor, constant: 60),
            button.centerXAnchor.constraint(equalTo: view.centerXAnchor)
        ])
    }
}
UserDefaults에는 object라는 메서드도 있음

object는 Any 타입을 return하기 때문에 ⭐️타입 캐스팅⭐️이 필요함
guard let object = UserDefaults.standard.object(forKey: "Object") as? String else { return }Animation

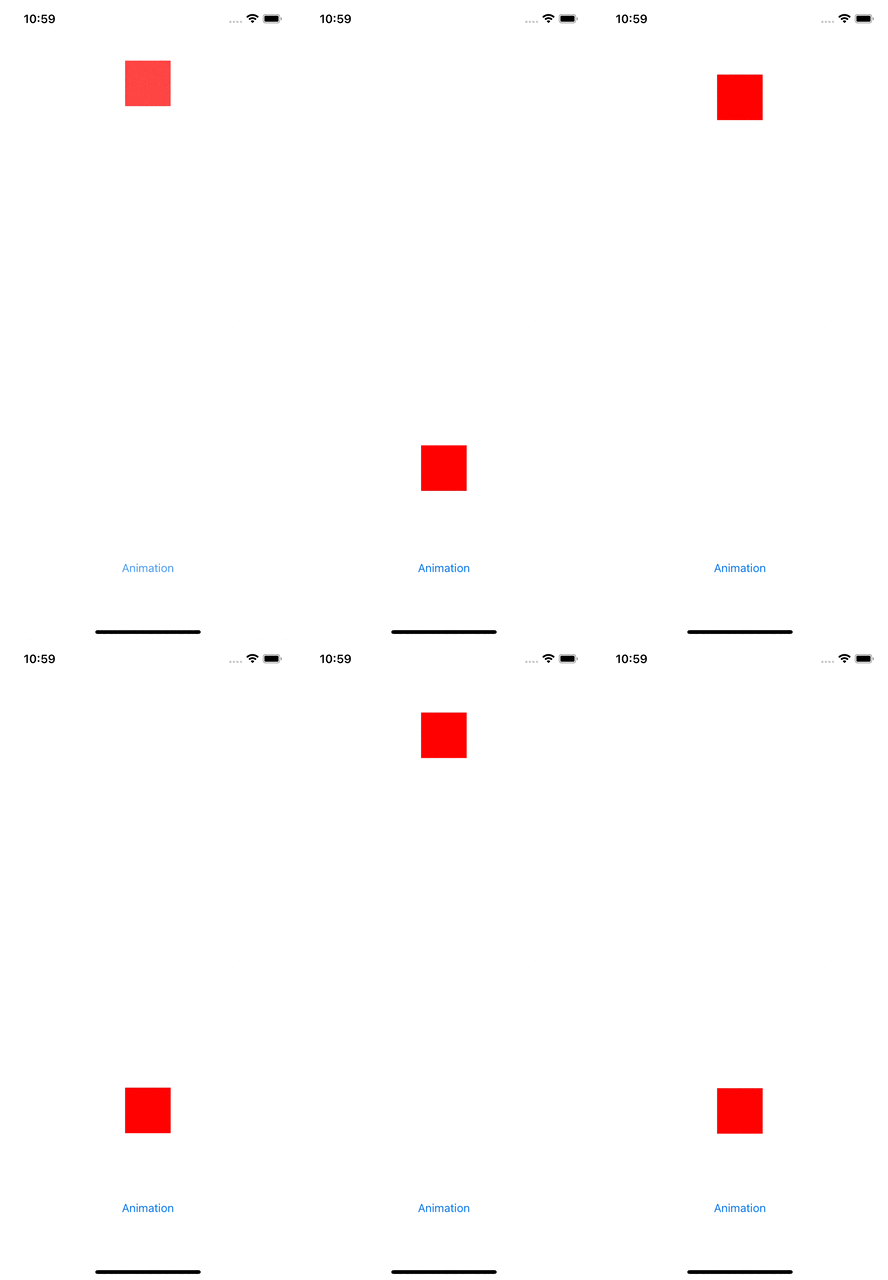
- topAnchor의 constant를 바꿔서 애니메이션을 주기 위해 redView의 topAnchor를 변수로 잡았음 -> isActive = true처리 필요
import UIKit

class ViewController: UIViewController {

    let redView = UIView()
    let button = UIButton(type: .system)
    var redViewTopAnchor: NSLayoutConstraint? //⭐️

    override func viewDidLoad() {
        super.viewDidLoad()
        configureUI()
    }
}

//MARK: -UI
extension ViewController {
    final private func configureUI() {
        setAttributes()
        addTarget()
        setConstraints()
    }

    final private func setAttributes() {
        redView.backgroundColor = .red
        button.setTitle("Animation", for: .normal)
    }

    final private func addTarget() {
        button.addTarget(self, action: #selector(startAnimation(_:)), for: .touchUpInside)
    }

    @objc func startAnimation(_ sender: UIButton) {
    	// 애니메이션 코드 작성
    }

    final private func setConstraints() {
        view.addSubview(redView)
        view.addSubview(button)
        redView.translatesAutoresizingMaskIntoConstraints = false
        button.translatesAutoresizingMaskIntoConstraints = false

        redViewTopAnchor = redView.topAnchor.constraint(equalTo: view.topAnchor, constant: 80)
        redViewTopAnchor?.isActive = true //⭐️

        NSLayoutConstraint.activate([
            redView.centerXAnchor.constraint(equalTo: view.centerXAnchor),
            redView.widthAnchor.constraint(equalToConstant: 60),
            redView.heightAnchor.constraint(equalToConstant: 60),

            button.centerXAnchor.constraint(equalTo: view.centerXAnchor),
            button.bottomAnchor.constraint(equalTo: view.bottomAnchor, constant: -80)
        ])
    }
}
애니메이션에는 두 가지 방법 있음
1. UIView.animate
    @objc func startAnimation(_ sender: UIButton) {
        UIView.animate(withDuration: 2, delay: 0, options: [.repeat, .autoreverse], animations: {
            self.redViewTopAnchor?.constant = 600
            self.view.layoutIfNeeded() // 강제로 뷰의 드로잉사이클을 호출해야만 애니메이션 효과가 보임. 그냥 같이 쓴다고 생각하면 됨.
        }, completion: nil)
    }
- self.view.layoutIfNeeded()를 해주지 않으면 애니메이션이 안되는 것처럼 보임. self.view.layoutIfNeeded()를 통해 강제로 뷰의 드로잉 사이클을 호출해야 애니메이션이 보임
2. priority
- anchor에 우선순위를 설정해주어 애니메이션을 넣는 방법
- 변수를 2개 생성
    var redViewTopAnchor: NSLayoutConstraint?
    var redViewBottomAnchor: NSLayoutConstraint?
- 일단은 두 anchor가 충돌하게 만들고, 각 priority 중에서 위쪽에 위치하는 constant(80)의 priorty를 더 높게 줌
final private func setConstraints() {
        view.addSubview(redView)
        view.addSubview(button)
        view.addSubview(stopButton)
        redView.translatesAutoresizingMaskIntoConstraints = false
        button.translatesAutoresizingMaskIntoConstraints = false
        stopButton.translatesAutoresizingMaskIntoConstraints = false

        redViewTopAnchor = redView.topAnchor.constraint(equalTo: view.topAnchor, constant: 80)

        redViewTopAnchor?.priority = .defaultHigh
        redViewTopAnchor?.isActive = true

        redViewBottomAnchor = redView.topAnchor.constraint(equalTo: view.topAnchor, constant: 600)
        redViewBottomAnchor?.priority = .defaultLow
        redViewBottomAnchor?.isActive = true

        NSLayoutConstraint.activate([
            redView.centerXAnchor.constraint(equalTo: view.centerXAnchor),
            redView.widthAnchor.constraint(equalToConstant: 60),
            redView.heightAnchor.constraint(equalToConstant: 60),

            button.centerXAnchor.constraint(equalTo: view.centerXAnchor),
            button.bottomAnchor.constraint(equalTo: view.bottomAnchor, constant: -80),

            stopButton.topAnchor.constraint(equalTo: button.bottomAnchor, constant: 20),
            stopButton.centerXAnchor.constraint(equalTo: view.centerXAnchor)
        ])
    }
- 그 후 애니메이션에서 아래 쪽에 위치하는 anchor의 constant의 priority를 더 높게 주면 됨.
    @objc func startAnimation(_ sender: UIButton) {
        UIView.animate(withDuration: 2, delay: 0, options: [.repeat, .autoreverse], animations: {
            self.redViewBottomAnchor?.priority = .required
            self.view.layoutIfNeeded() // 강제로 뷰의 드로잉사이클을 호출해야만 애니메이션 효과가 보임
        }, completion: nil)
    }
Priority : NSLayoutConstraint의 Instance property

- 1 ~ 1,000 사이의 값을 가지며, 제일 높은 값은 1,000
- 높을수록 우선 순위가 높은 것
- 기본적으로 .required, .defaultHigh, .defaultLow가 제공됨
redViewTopAnchor?.priority = .required // 1,000
redViewTopAnchor?.priority = .defaultHigh // 750
redViewTopAnchor?.priority = .defaultLow // 250
- 직접 값을 설정할 수도 있음
redViewTopAnchor?.priority = UILayoutPriority(750)
UIViewPropertyAnimator
- 비교적 최근에 나온 Animation 관련 클래스
- stop하는 기능까지 제공하기 때문에 훨씬 유용
https://developer.apple.com/documentation/uikit/uiviewpropertyanimator
Apple Developer Documentation
developer.apple.com
'순진이의 하루 > study정리' 카테고리의 다른 글
| 9. URLSession_2022.08.31 (0) | 2022.08.31 |
|---|---|
| 8. 고차함수, UIViewPropertyAnimator_2022.08.29 (0) | 2022.08.29 |
| 6. CollectionView code로 짜기, Delegate Pattern_2022.08.22 (0) | 2022.08.22 |
| 4. CustomView_2022.08.10 (0) | 2022.08.09 |
| 3. 스토리보드 삭제, tableView cell configuration_2022.08.08 (0) | 2022.08.04 |
- Total
- Today
- Yesterday
