
티스토리 뷰
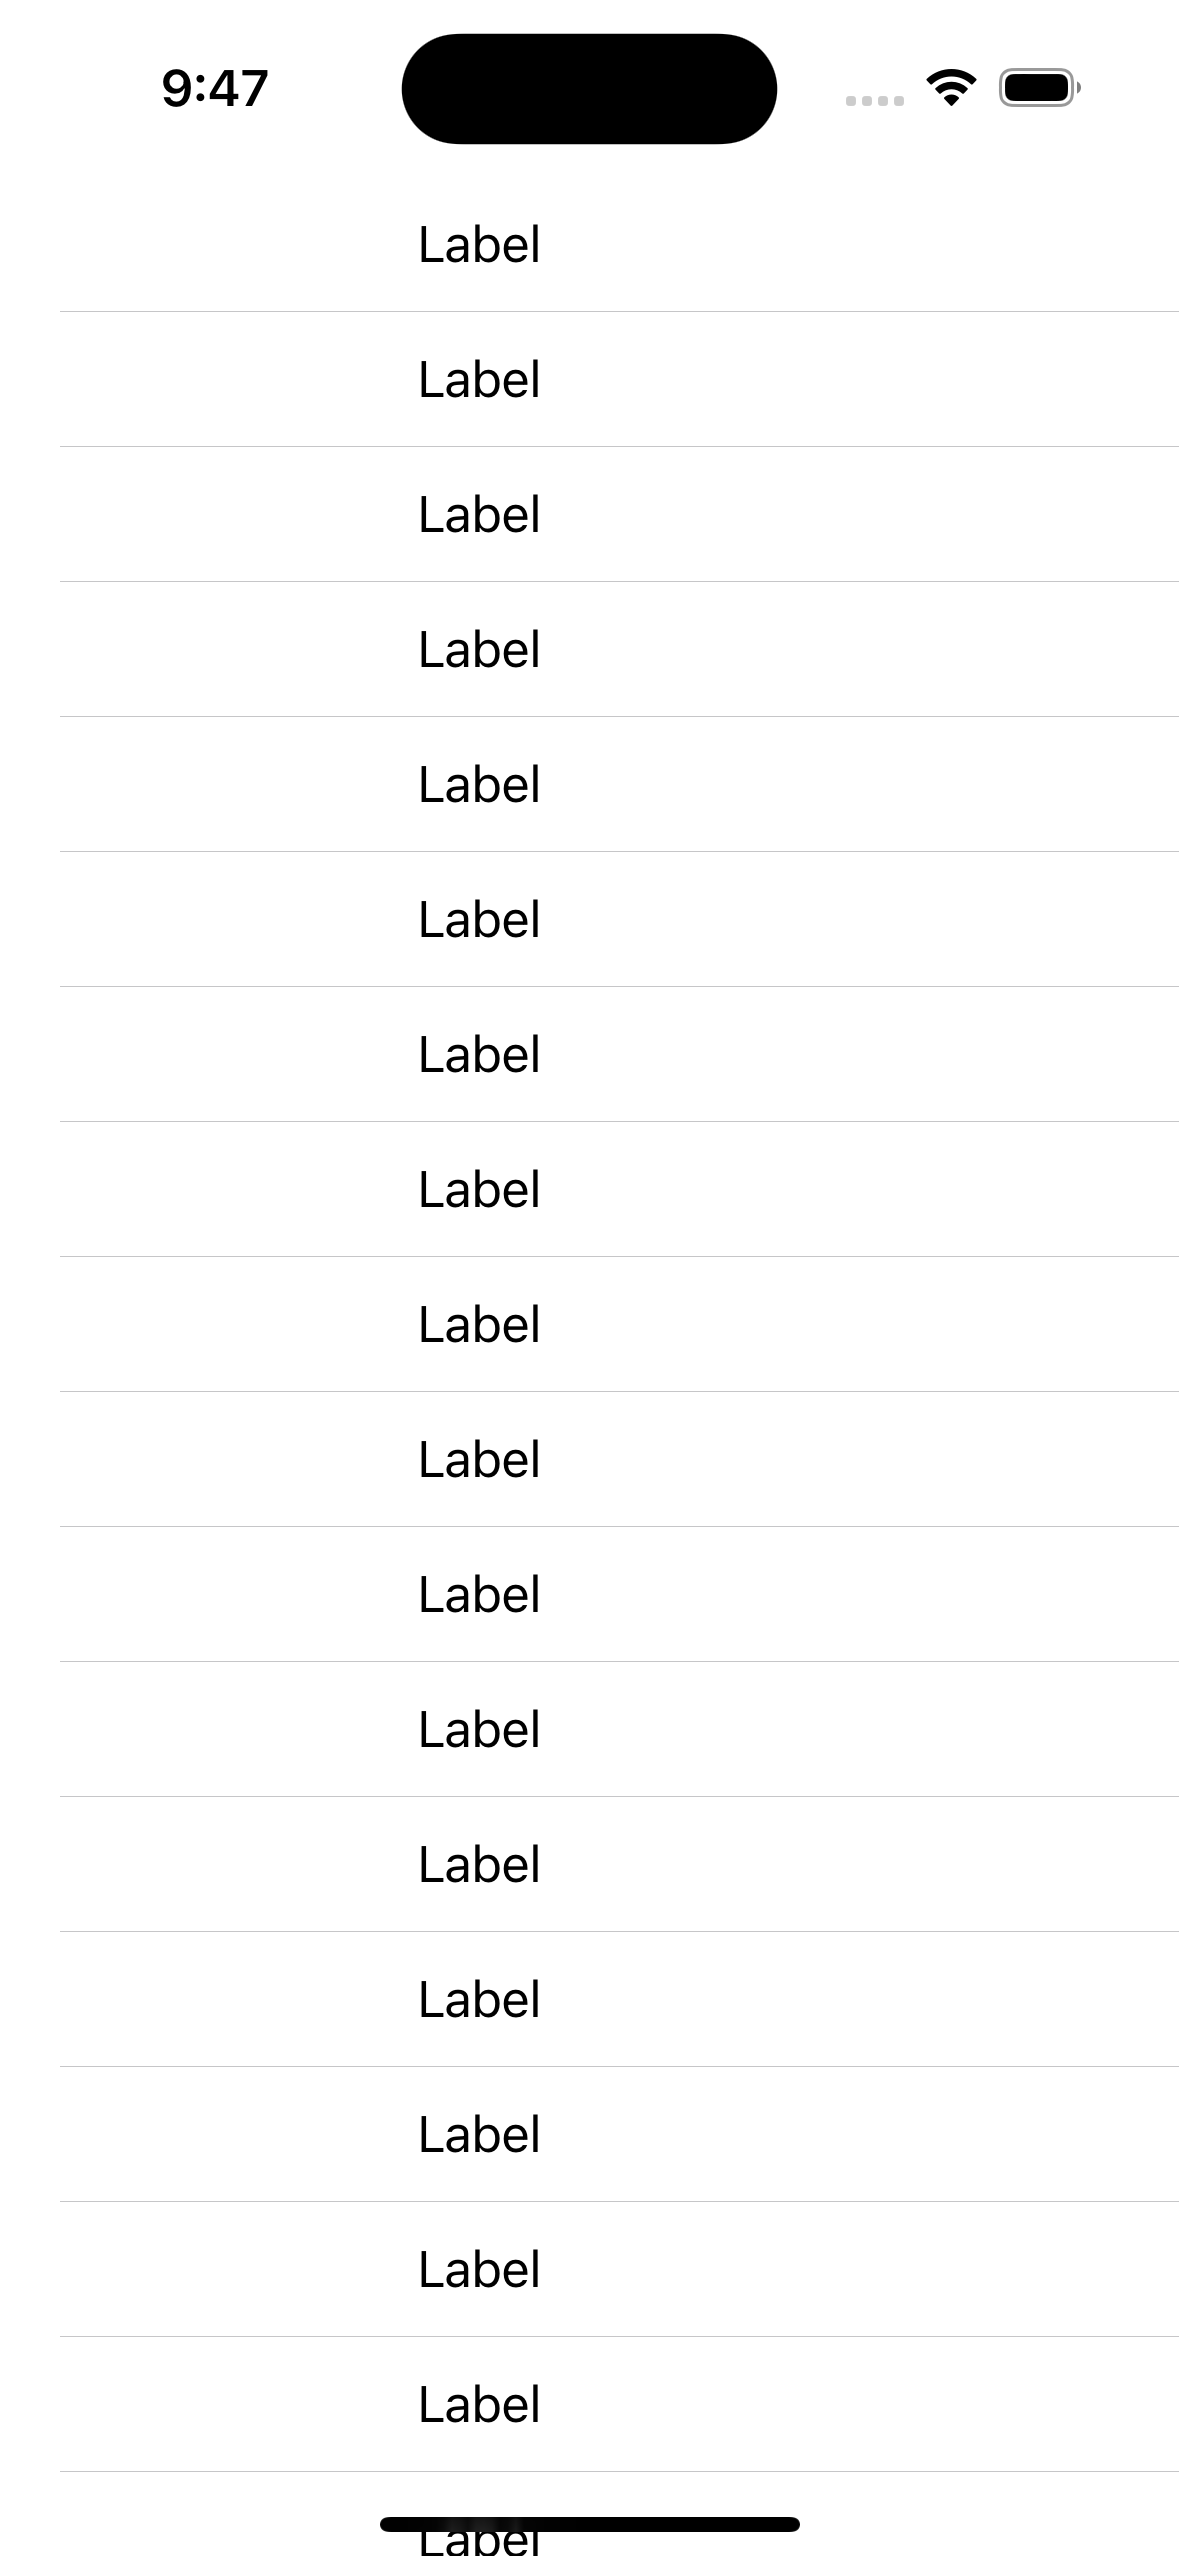
Main 스토리보드와 연결된 ViewController에 테이블뷰 만들기
import UIKit

class ViewController: UIViewController {

    @IBOutlet weak var tableView: UITableView!

    override func viewDidLoad() {
        super.viewDidLoad()
        tableView.dataSource = self
    }

extension ViewController: UITableViewDataSource {
    func tableView(_ tableView: UITableView, numberOfRowsInSection section: Int) -> Int {
        return 100
    }

    func tableView(_ tableView: UITableView, cellForRowAt indexPath: IndexPath) -> UITableViewCell {
        return UITableViewCell()
    }
}
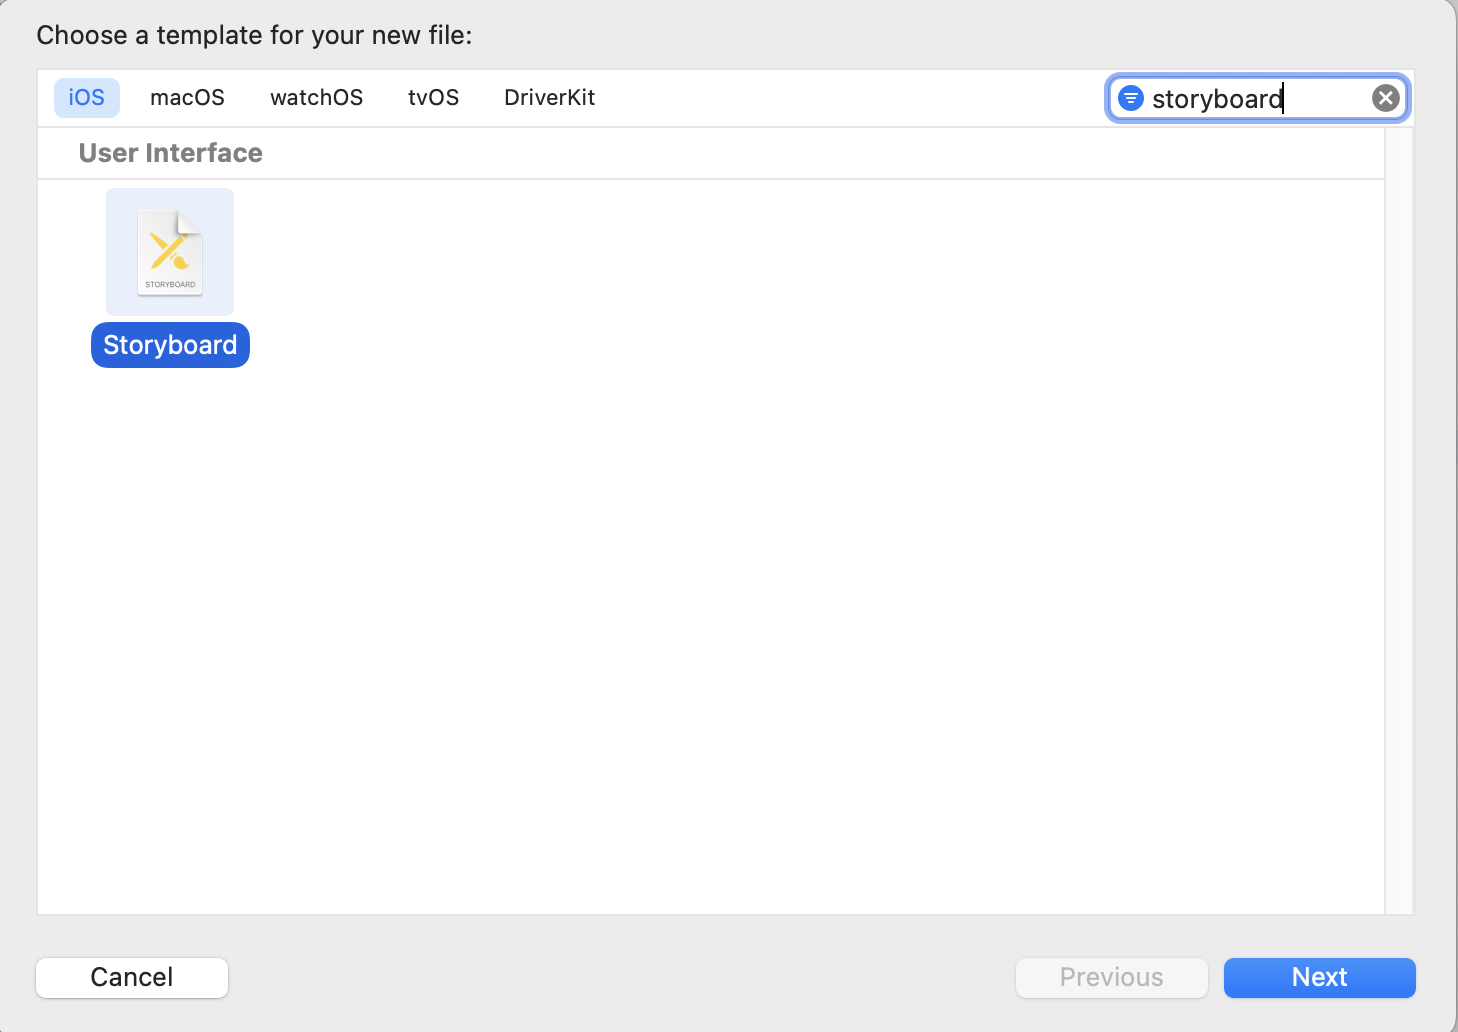
스토리보드 여러개 만들고 연결하기
commnad + N -> Storyboard (이번 프로젝트에서는 Home이라는 이름으로 만들어줌)
Home이라는 스토리보드에 연결될 HomeViewController 만들어서 storyboard와 연결하기
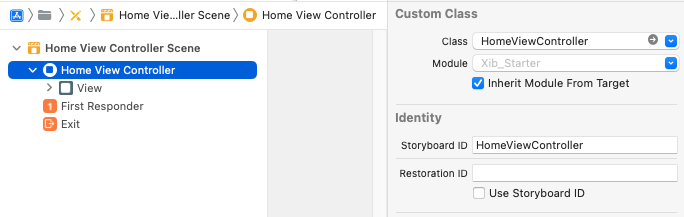
* tip : identifier 설정하는 새로운 방법
import UIKit

class HomeViewController: UIViewController {

    static let identifier = String(describing: HomeViewController.self)

    override func viewDidLoad() {
        super.viewDidLoad()
    }
}
storyboard 불러내는 법
- enum을 사용하면 여러개의 스토리보드를 불러내기 쉬움
- enum case의 rawValue 이용해서 사용
- identifier는 위에서 설정한 방법을 사용하면 편함. HomeViewController.identifier
    func instantiateStoryboard(type: Storyboard) {
        let storyboard = UIStoryboard(name: type.rawValue, bundle: nil)
        let vc = storyboard.instantiateViewController(withIdentifier: HomeViewController.identifier)
        vc.view.backgroundColor = .systemRed
        present(vc, animated: true)
    }


enum Storyboard: String {
    case home = "Home"
}
⬆️위 코드를 잘 보기 위해 ViewController의 viewDidAppear에서 해당 코드 실행해줌
override func viewDidAppear(_ animated: Bool) {
    super.viewDidAppear(animated)
    instantiateStoryboard(type: .home)
}
CustomTableViewCell Nib 파일로 만들기
commnad + N -> Cocoa Touch Class -> UITableViewTableCell을 상속한 클래스 만들어주기 (✔️반드시 Also create XIB file 체크하기)
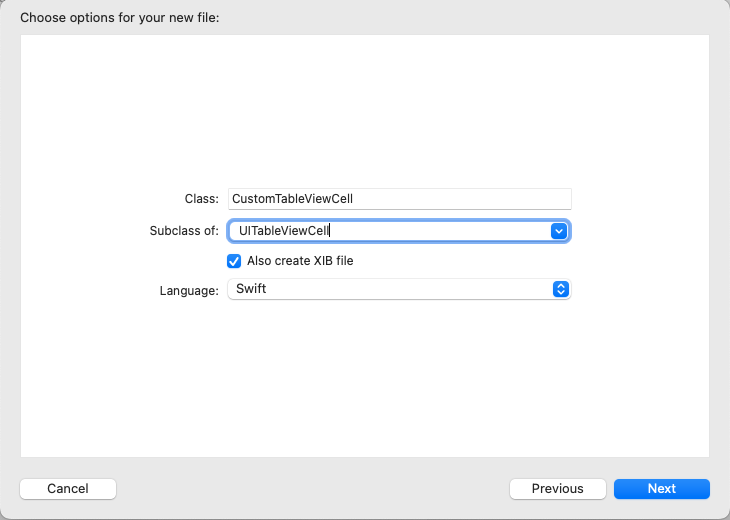
xib 파일과 swift 파일 -> 두개의 파일이 만들어짐
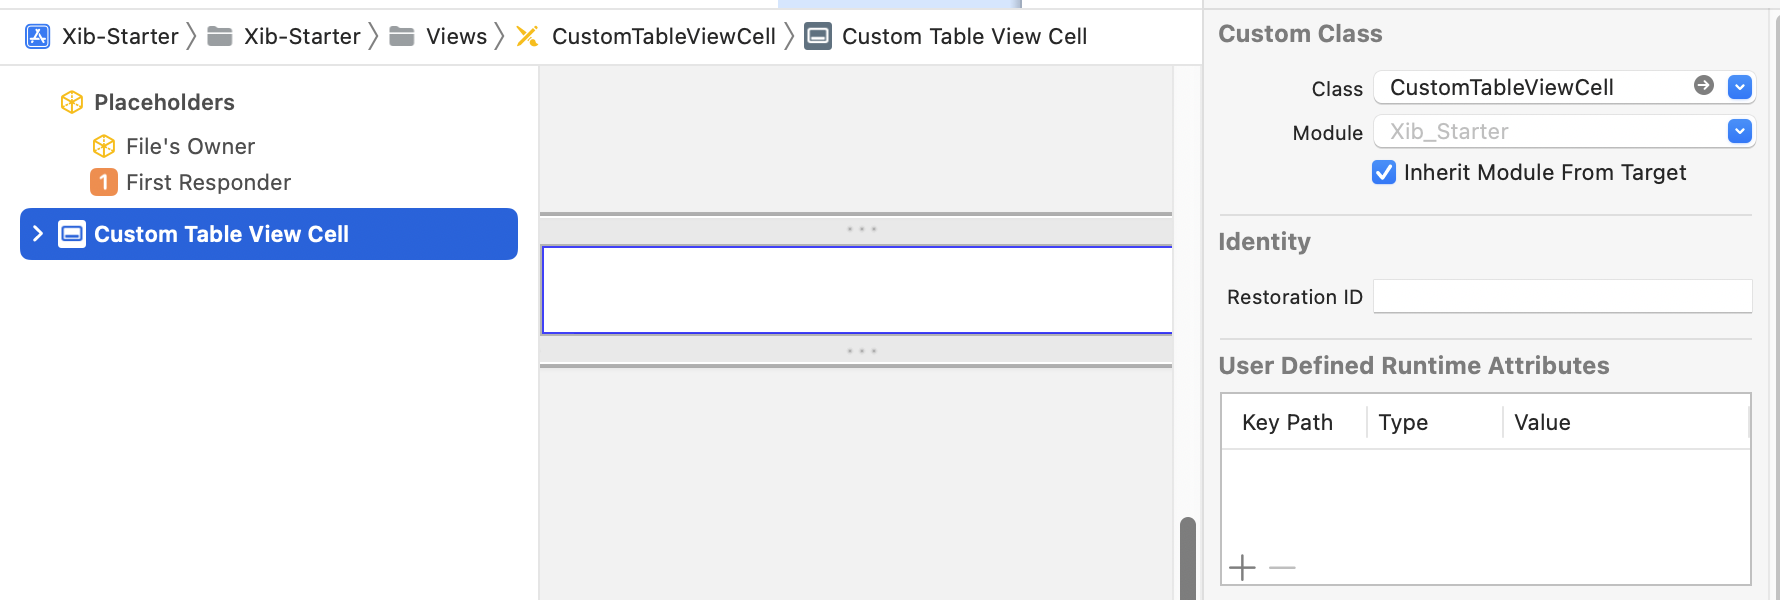
두 파일을 서로 연결해주기 (Xib에 연결된 클래스를 CustomTableViewCell로 설정하기)
CustomTableViewCell에서 identifier 설정하기
import UIKit

class CustomTableViewCell: UITableViewCell {

    static let identifier = String(describing: CustomTableViewCell.self)

    override func awakeFromNib() {
        super.awakeFromNib()
        // viewDidLoad와 비슷한 역할
    }

    override func setSelected(_ selected: Bool, animated: Bool) {
        super.setSelected(selected, animated: animated)
    }
}
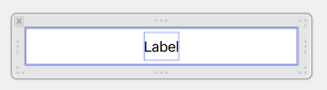
CustomTableViewCell에 레이블 추가
- command + shift + L -> 레이블 추가
ViewController에 가서 CustomTableViewCell 등록
- nib파일로 등록해야 함!
import UIKit

class ViewController: UIViewController {

    @IBOutlet weak var tableView: UITableView!

    override func viewDidLoad() {
        super.viewDidLoad()
        tableView.dataSource = self
        let nib = UINib(nibName: CustomTableViewCell.identifier, bundle: nil) //⭐️
        tableView.register(nib, forCellReuseIdentifier: CustomTableViewCell.identifier) //⭐️
    }
}

extension ViewController: UITableViewDataSource {
    func tableView(_ tableView: UITableView, numberOfRowsInSection section: Int) -> Int {
        return 100
    }

    func tableView(_ tableView: UITableView, cellForRowAt indexPath: IndexPath) -> UITableViewCell {
        let cell = tableView.dequeueReusableCell(withIdentifier: CustomTableViewCell.identifier, for: indexPath)
        return cell
    }
}
nib으로 CustomView도 만들 수 있음!
* CustomView의 경우에는 연결된 클래스를 File's owner에서 설정해주는 게 좋음!
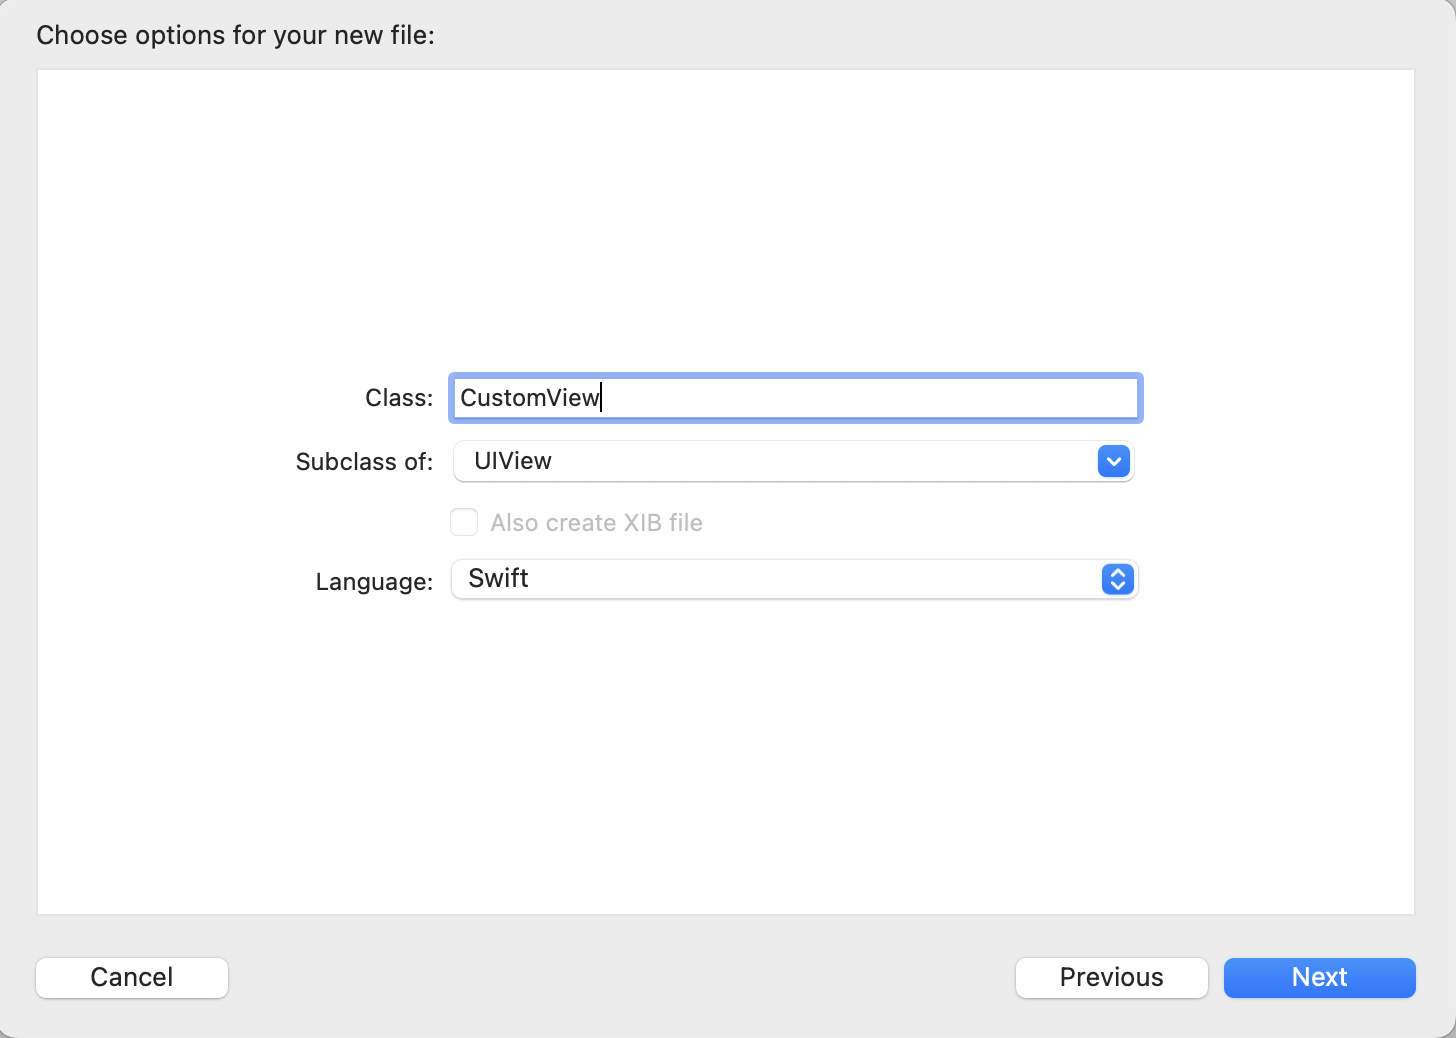
우선 commnad + N을 통해서 UIView 만들기
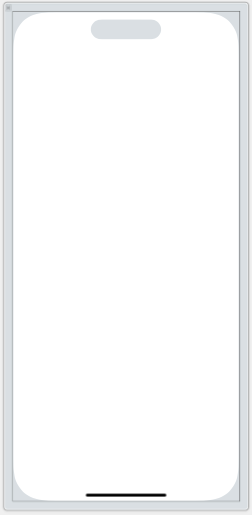
만든 View의 Size를 Freeform으로 설정해주면, 좀 더 작업하기 편함

Freeform 설정을 안 하면 아래와 같이 핸드폰 화면처럼 나옴
commnd + N 눌러서 swift 파일 만들기 (customView.swift)
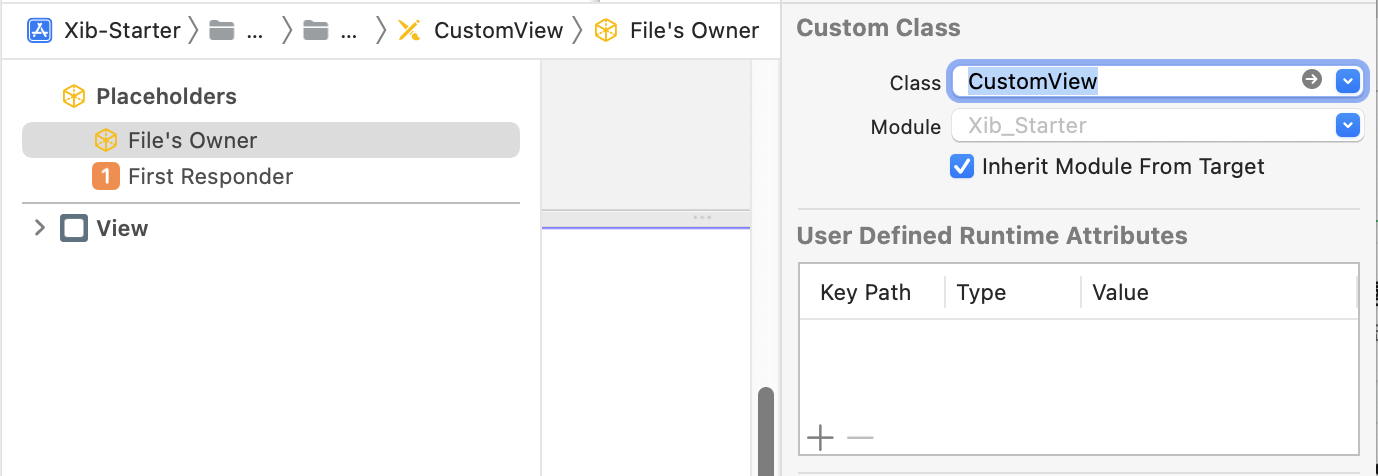
File's Owner의 연결된 Class를 방금 만든 CustomView로 연결해주면 됨.
SecondViewController 파일을 만들어서 연결하기
'순진이의 하루 > study정리' 카테고리의 다른 글
| 21. UITableViewDiffableDataSource (0) | 2023.01.03 |
|---|---|
| 19. 쫌쫌따리 유용한 정보_2022.12.12 (0) | 2022.12.05 |
| 16. Preprocessor_2022.10.24 (0) | 2022.10.24 |
| 15. MapKit2_2022.09.26 (1) (0) | 2022.09.26 |
| 13. async/await_2022.09.19 (0) | 2022.09.19 |
- Total
- Today
- Yesterday